Creating a JAX-WS Web Service and corresponding client is a very trivial task. However I faced various problems while doing the same mainly while creating a client for the web service. This was mainly because the contents I found on the Internet were in a distributed manner. So I thought of creating a tutorial which binds all the concepts at one place.
So this tutorial does not teaches indepth concepts of web services. Instead it guides as how to create a Web Service and a seperate client.
Software Requirements:
1. Eclipse Indigo.
Note: To download Eclipse Indigo follow the link http://www.eclipse.org/downloads/. Then select 'Eclipse IDE for Java EE Developers'.
Process:
We will proceed with the creation of web service and client in following two steps:
1. Creating Web Service
2. Creating client to consume web service.
1. Creating Web Service:
Creating of a JAX-WS web service is not a very tough task. We simply create a class(normal Java class) and define certain methods in the class, rest of the work is done by Eclipse IDE, which converts this Java class in to a web service.
Now we will create a class "MyService.java" that will be later converted to a web service.
a. Select 'File->New->Dynamic Web Project'.
b. In the window displayed below enter Project Name as MyService and press Next.

d. Now press Next then Finish.
e. MyService project will be displayed in the project explorer as displayed below:

f. Under the src folder add a package servicePkg.
g. Under the servicePkg add a class MyService.java.
h. The project structure will be as shown below:
 i. Add following code to class MyService.java

Now we are done with creating our class. This simple class will act as the base of our web service.
Converting a Java Class to web service:
Now we will convert the MyService.java created above into a web service.:
a. Select 'File-> New -> Other...'
b. In the wizard mentioned below select Web Services -> Web Service
 Click Next
c. Following page will appear.
 d. Under Configuration section select hyperlink Service project: MyService (under this hyperlink we will define the project that is to be converted to a web service. Initially some garbage project may be displayed, we need to convert it to MyService). Following window will appear:

e. Under 'Service Project' select our project MyService and press OK.
f. Press Next again Next. Following window will appear:
 press Start server, wait till server starts. After server starts click Next then Finish.
g. Check the structure of project under 'Project Explorer' section. Under WebContent a folder wsdl is created that contains a file named MyService.wsdl (this MyService.wsdl file will be used later to create client).
Now we are done creating out web service
2. Creating Client:
Client creation is again a simple task. Client is a simple java class that calls the methods of web service, but client is not aware that the methods it is calling are executed at some other location. To client it seems that the methods are executed locally. In order to do so there is need of some proxy and stub class. But it is not our burden as these things are done automatically by Eclipse IDE.
Steps to create Client:
a. Select 'File -> New -> Project'
b. On the Select a wizard window select Java Project
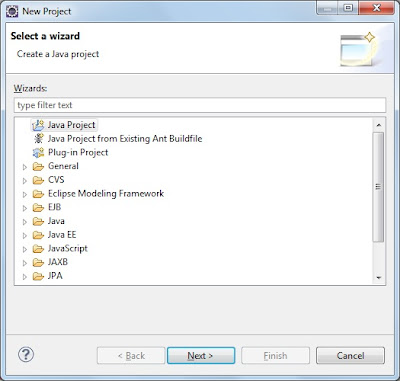
c. Select Next. On Create a Java Project enter project name as MyClient

d. Select Next then Finish
e. Select File -> New -> Other
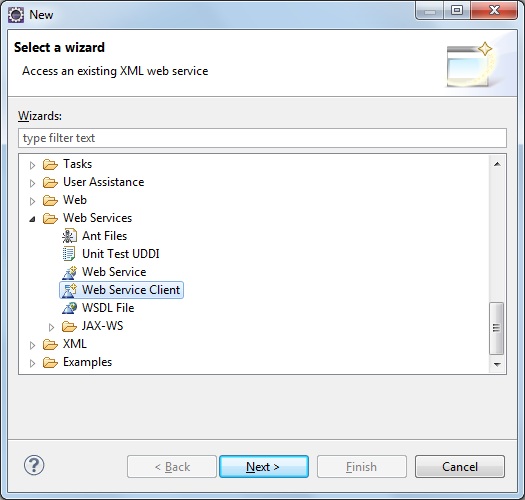
f. On Select a Wizard window select Web Services -> Web Service Client
 click Next
g. On Web Services window select Browse
h. Again select Browse
i. Select MyService.wsdl under project MyService
 select OK
j. Again select OK
k. Again on Web Services window select hyperlink Client project: MyClient (This option is used to declare as to which project is used as client for the web service.)
 select MyClient under client project dropdown and press OK
l. Select Next then Finish
m. Check the structure of MyClient project under Project Explorer section. All the necessary stub and proxy classes are added to the client.

o. Now we need to create a class that calls the service methods. Add clientPkg under src folder.
p. Add class MyClient.java under clientPkg

q. Add following code to MyClient.java

now our client creation is complete.
To run client right click project MyClient and select RunAs -> 3 Java Application
You will see the output Hello - message from client
So this tutorial does not teaches indepth concepts of web services. Instead it guides as how to create a Web Service and a seperate client.
Software Requirements:
1. Eclipse Indigo.
Note: To download Eclipse Indigo follow the link http://www.eclipse.org/downloads/. Then select 'Eclipse IDE for Java EE Developers'.
Process:
We will proceed with the creation of web service and client in following two steps:
1. Creating Web Service
2. Creating client to consume web service.
1. Creating Web Service:
Creating of a JAX-WS web service is not a very tough task. We simply create a class(normal Java class) and define certain methods in the class, rest of the work is done by Eclipse IDE, which converts this Java class in to a web service.
Now we will create a class "MyService.java" that will be later converted to a web service.
a. Select 'File->New->Dynamic Web Project'.
b. In the window displayed below enter Project Name as MyService and press Next.

d. Now press Next then Finish.
e. MyService project will be displayed in the project explorer as displayed below:

f. Under the src folder add a package servicePkg.
g. Under the servicePkg add a class MyService.java.
h. The project structure will be as shown below:


Now we are done with creating our class. This simple class will act as the base of our web service.
Converting a Java Class to web service:
Now we will convert the MyService.java created above into a web service.:
a. Select 'File-> New -> Other...'
b. In the wizard mentioned below select Web Services -> Web Service

c. Following page will appear.


e. Under 'Service Project' select our project MyService and press OK.
f. Press Next again Next. Following window will appear:

g. Check the structure of project under 'Project Explorer' section. Under WebContent a folder wsdl is created that contains a file named MyService.wsdl (this MyService.wsdl file will be used later to create client).
Now we are done creating out web service
2. Creating Client:
Client creation is again a simple task. Client is a simple java class that calls the methods of web service, but client is not aware that the methods it is calling are executed at some other location. To client it seems that the methods are executed locally. In order to do so there is need of some proxy and stub class. But it is not our burden as these things are done automatically by Eclipse IDE.
Steps to create Client:
a. Select 'File -> New -> Project'
b. On the Select a wizard window select Java Project

c. Select Next. On Create a Java Project enter project name as MyClient

d. Select Next then Finish
e. Select File -> New -> Other
f. On Select a Wizard window select Web Services -> Web Service Client
g. On Web Services window select Browse
h. Again select Browse
i. Select MyService.wsdl under project MyService

j. Again select OK
k. Again on Web Services window select hyperlink Client project: MyClient (This option is used to declare as to which project is used as client for the web service.)

l. Select Next then Finish
m. Check the structure of MyClient project under Project Explorer section. All the necessary stub and proxy classes are added to the client.

o. Now we need to create a class that calls the service methods. Add clientPkg under src folder.
p. Add class MyClient.java under clientPkg

q. Add following code to MyClient.java

now our client creation is complete.
To run client right click project MyClient and select RunAs -> 3 Java Application
You will see the output Hello - message from client
Thanks a lot.....
ReplyDelete@THE PRINCE: Thanks for your feedback... :)
DeleteThanks Rajeev
ReplyDeletethanks for your feedback.
DeleteThis comment has been removed by the author.
ReplyDeleteThis is great. Your tutorial helped me a lot!!!
Delete@Jash: Thanx for your feedback...I am glad it helped you :)
DeleteThanks it helped me a lot .
ReplyDelete